Quilt Journey

Friday, July 07, 2006

Quilt #5: Vincent's Utopia

I wanted to combine several techniques into one project, and wanted to do something with sky and water. Thus, Vincent's Utopia was born.

BACKGROUND
My husband LOVES to fish. In fact, most of the men in my life loving fishing. I personally cannot stand fishing, but it gets the hubby out of the house for a while. I do, however, love the sunset, clear water and brightly colored fish. I also like hanging out in a boat, but I don't like fishing. Strange, isn't it? Maybe it's because I'm not supposed to talk?

Anyway, I digress.

I decided I wanted to try out fabric painting and combine it with thread painting and beadwork. I found the beautiful fish beads at Wal-Mart, (of all places), so I knew I wanted to do something to feature them. I remembered a challenge in a previous issue of Quilting Arts where readers were supposed to make something that represented their utopia. When I tried to think of mine, my mind went blank. So, I decided to think of what my husband's utopia would be, and the idea was born.

Photobucket - Video and Image Hosting

Photobucket - Video and Image Hosting

Photobucket - Video and Image Hosting

Photobucket - Video and Image Hosting

Photobucket - Video and Image Hosting

TECHNIQUES
I started with a plain piece of white cotton fabric and sketched the main areas of color directly onto the fabric with a pencil. I then used fabric paint to add the colors. As a last step, I added a shimmery, clear paint over the top of the water to give the glowing effect. After heat-setting the paint, I then thread painted the sky using rayon and poly embroidery threads. I did a very light quilting using a metallic thread in the water to mimic waves. Finally, I hand-sewed the beads to the piece.

Wednesday, June 28, 2006

Project: Ballet Baby Blanket

06/28/2006

I currently work with a husband and wife at my small company, and they are expecting a baby girl in just a few short weeks. In keeping with my tradition, I decided to make a baby blanket for the new arrival.

BACKGROUND
Although I prefer art quilting and non-traditional techniques, there is a part of me that loves traditional patterns. I love studying the history of quilts and am always amazed at the accuracy of the piecing and quilting. Every now and then I get the itch to try out something I find, and a baby blanket gives me the perfect opportunity to do so - big enough to try it out and small enough to not turn into a nightmare!

In one of the quilting forums I belong to someone posted about the pillow quilts. You remember those, don't you? Typically they are done in bright, funky colors, but I thought it would be a nice twist to try the technique in pinks and purples. I found a cute ballerina fabric for the back and it just went from there.

Photobucket - Video and Image Hosting

Photobucket - Video and Image Hosting

Photobucket - Video and Image Hosting

TECHNIQUES
There are two ways to do a pillow quilt. I chose the easiest! (The more traditional method is to do some strange folding & pinning and since I hate to pin anything . . . . . LOL!) Basically, I cut the squares for the quilt top (5 inches - 1 inch larger than the finished size) and cut squares of muslin (also 1 inch). I had a total of 120 fabric squares and 120 muslin squares.

I sewed the squares to the muslin (right sides together) leaving an opening for turning. I clipped the corners, turned and pressed. Next I stuffed the squares with a very soft batting. My son was a real help here since he has smaller fingers. The trick is to get enough batting in there to make a pillow but not too much that you end up having a hard time getting two pillows in the sewing machine.

After all squares were stuffed, I joined them, alternating the three colors. Once the top was finished, I attached the pre-made ruffle. Finally, I attached the ballerina fabric to the back.

Monday, June 19, 2006

Quilt #3: Why Do I Sew

06/19/2006

Indulge me in a bit of a cheat, if you will. I had two quilt projects going on this past week, but didn't quite get finished since I had to travel on business. So, I decided to post one of my favorite projects.

BACKGROUND
I subscribe to Quilting Arts magazine (love it, by the way) and several months back I came across a article about Susan Shie (www.turtlemoon.com). I was immediately enhanted with her technique and style. It is so expressive, so free, so non-traditional! I think I re-read that article 10 times that weekend, and I still refer to it often when I need a burst of inspiration. I knew right away that I had to do something to try her technique out - but what?

A few weeks after reading the article I was at my local quilt club when we were presented with a challenge. Basically, each of us were handed a 12 inch piece of a fabric bolt roll (the kind that the decorator fabric comes on) and were told to make something out of it. One of the ideas was to make a mini-quilt roll. Basically, our instructions were to place felt on the inside to hold quilt blocks, and include pockets for needles, thread, scissors, etc. The outside was to be decorative. Ties were to be included at the end to secure everything inside the roll. I knew right away that I wanted to try out Susan's techniques on this project.

As I drove home - ideas spinning through my head - I decided that I wanted to do something for ME. (Almost every quilt I have ever done has been given away. As of today, I own only one quilt - received it back after my grandmother passed - and the mini-quilts I've been sharing here.) I decided that I wanted it to be personal. So, my idea of a self-portrait was born.

Photobucket - Video and Image Hosting

Photobucket - Video and Image Hosting

TECHNIQUES
I started with the wonderful orange and yellow batik (still a favorite of mine) and appliqued the fabric pieces using embroidery floss. The goal with the floss is to use big, chunky stitches and switch up the color as much as possible. The hair includes bobbinwork and hand beading with bugle beads. The sewing machine includes seed beads, as well as some chunky, smiley and glow-in-the-dark alphabet beads. The wording and facial features were thread painted, and the background was quilting using what I affectionally call my "stepped on stipple stitch."

Sunday, June 11, 2006

Project: Appliqued Birthday Shirts

06/10/2006

A friend of mine has twin girls, and they turned 3 this past weekend. To commerate the event, the parents decided to have a petting zoo birthday party, and I was asked to make some shirts to go along with the theme.

BACKGROUND
I tell you, it was not easy coming up with something to fit "barnyard birthday." My mind was blank! I decided to "google it" and was surprised to find some birthday accessories (plates, cups, etc.) that fit the theme pefectly. Ultimately the parents purchased the party accessories, and the design was born. I adapted the elements slightly. Since I was working on a 4T shirt I had to remove one of the animals and the bird that is in the original design. I then added the birthday cake and party hats.

I decided to hand embroider the girls' names on the banner. I've been expanding my hand embroidery skills lately - more than the simple cross, back and straight stitch. My grandmother use to do lots of hand embroidery, and that's something I plan to continue in her memory.

Photobucket - Video and Image Hosting

Photobucket - Video and Image Hosting

Photobucket - Video and Image Hosting

TECHNIQUES
I started by drawing the design on a piece of 8 x 10 paper, and then went over the major lines with a Sharpie marker. I then turned the paper over to reverse the image. I used Heat and Bond light to trace the pattern, and then attached the pieces to the appropriate color of fabric. I then heat set the pieces directly to the background fabric. (With a small shirt, it's easier to attach one large background fabric to the shirt rather than trying to applique each piece individually.)

Next I appliqued each piece, starting with the parts of the picture that would be in the background first. I then hand embroidered parts of the pig and cow. Next I added beads for the eyes and hat tops, and finally a cow bell. I then attached the entire piece to the shirt and appliqued all the way around. The final step was to hand embroider the names to the banner.

Repeat entire process . . . since there were two shirts!

Sunday, June 04, 2006

Quilt #1: Jacob?

06/04/2006

Okay, so my first mini-quilt took two weeks, but it ended up being more of an emotional journey for me that I bargained for.

BACKGROUND
The Friday before Memorial Day my 8-year old son was missing. For two terrifying hours, my husband and I searched along with the police for Jacob. There were about ten patrol cars looking for him and my husband was driving on neighboring streets. I spent the time walking up and down our own street calling his name. I was in tears and very near hysterical. I remember while searching for him that my friendly neighboorhood street seemed evil and menacing. Once we found Jacob, I sat down to capture my feelings that day. This first mini-quilt, entitled Jacob? is a reflection of my feelings that day.

The houses have an accusing look on their face. "How can you lose track of your son?" They also have blood red windows and doors that look more like eyes and a howling mouth. They are also tall, showing how small and powerless I felt. As I roamed the neighborhood, I found it difficult to control the frightful images of what might be occurring. Every house looked like a den of evil. Every person I saw looked like a child molester.

The sky is uncertain. "Will I find my son?", "Will he be okay?", "Is he hurt?", "Does someone have my son?" Those were just a few of the questions that tormented me.

The white street is hope - hope that he will be returned to me safely. The entire time we searched I had this tiny voice inside telling me everything was fine. The longer the search went, the harder it was to hear that voice.

The quilt is bound with staples, barley keeping it together. That's how I felt that day - as if I were coming apart at the seams.

Photobucket - Video and Image Hosting

Photobucket - Video and Image Hosting

Photobucket - Video and Image Hosting

TECHNIQUES
Materials used were lightweight canvas, fabric paints, crayons, poly and rayon threads. I started by drawing the picture with pencil directly onto the canvas, which was not ironed. I then used crayon to color in the major areas. Next, I applied fabric paint on top of the crayons to achive a deeper color. Paint colors were allowed to bleed. After drying, the paint was heat set and low-loft batting was pinned to the back of the picture.

For thread painting, I set my machine for free-motion embroidery and removed the foot. (I seem to work better with no foot, but you have to watch your fingers). For the sky, I used complimentary colors on top of the paint color to add another dimension.

Finally, I cut the piece with my picking shears, not paying too much attention to keeping straight lines. I then used a stapler to attach the front and back together.

Thursday, May 25, 2006

What's This All About?

05/24/2006

Okay, so I said I'd be back later this weekend. I lied. I'm just so excited that I'm having trouble concentrating at work today, so I decided to give myself a quick break. All work and no play . . . right?

A little about me . . .

I'm 36, married with one child. I work in the technology industry and have a very busy and stressful job. A few months ago I started what I am affectionately calling my mid-life crisis. (Hey, what can I say? I'm an overachiever!). As part of my mid-life crisis, I'm re-evaluating a lot of thngs in my life . . . figuring out what's important and what's not . . . trying to focus on me . . . you know how it goes. A big part of this has been my weight loss journey, which is detailed on my other blog - www.nomamacow.blogpot.com.

I've realized that my weight has a lot to do with the fact that I'm an emotional eater and tend to eat rather than face issues or endure conflict.

Okay, great, now what does this have to do with quilting?

I'm getting there . . .

Another part of my mid-life crisis includes some serious self-reflection. I know that at some point in my life I felt like I was on top of the world - that I could do anything - that I was in charge. I miss that girl. Yeah, she was naive on some things, but she was a lot of fun to hang out with. So, in the last few weeks I've been trying to remember what it was like to be her. (This is a really fun exercise, by the way. I found the best way for those memories to come flooding back is to listen to the music that I loved when I was in high school. See, now aren't you glad you didn't toss out that cassette player and all those tapes?)

After listening to the tunes for a few weeks (DH thought I was crazy) I realized that some of my best, most peaceful, most relazing times, were times that I spent quilting. You see, I learned to love quilting at a very young age from my grandmothers. I remember watching them sew for hours - all by hand of course. One of my grandmothers also sewed clothing and the other one also did lots of hand embroidery. I mostly remember how peaceful they seemed while working - almost as if the rest of the world didn't exist.

I began quilting in my early 20s. Well, let me rephrase that, I began attempting to quilt in my early 20s. Mostly I did cross-stitch. My passion for fabric, however, immediately blossomed. I can show total restraint when it comes to anything - except fabric. Something about going to a fabric store makes my pulse race. If you're a quilter, you know what I'm talking about.

My first few attempts at quilting were frustrating, but strangely exciting. I learned really quickly that I am NOT a traditional quilter. My perfectionist personality will not allow me to finish a block that isn't 100% perfect. I embraced art quilting early on.

So, flash forward a few years to Tuesday of this week. Here's the deal - I work like a dog. I don't get to quilt as much as I want to. I have 10 millions ideas that I want to try and countless quilts that I want to make. I can't quit my job (I like to live inside) and I'm pretty sure I won't live for another thousand years. So, I'm frustrated. I'm angry. I'm an artist that has been denied the ability to create.

So, do I give up quilting?

No . . . I'm not a nice person when I don't get to express my creative side.

Do I quit my job?

No . . . again, liking the living indoors thing.

Do I find a less demanding job?

Yes . . . working on that now.

Tuesday evening, feeling down, I decided to go to my bedroom, lock myself up and read my latest issue of Quilting Arts magazine (www.quiltingarts.com). HOLY COW! There's this article about this fiber artist who creates one mini-quilt each week. When I say mini, I meean about 8 x 10. As I read her interview, I felt excited for the first time in a long time. Finally, here was a way for me to try out those 10 million ideas without the pressure of creating a perfect quilt suitable for gift-giving. I could do this for ME!

Remember, I mentioned that I'm trying to do more for me . . .

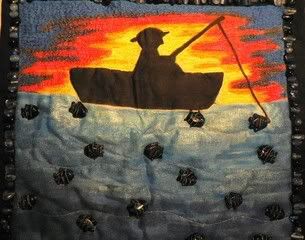
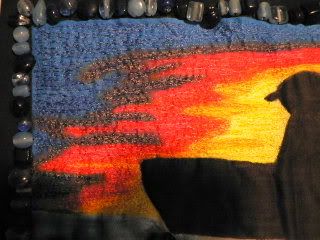
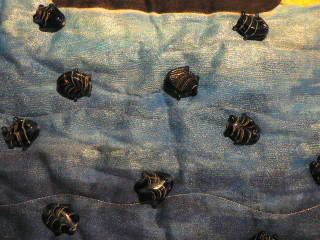
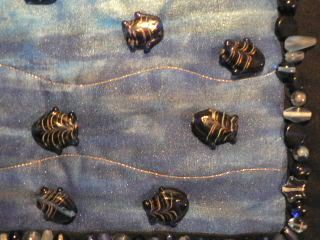
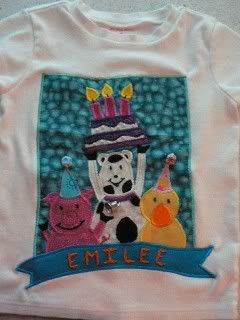
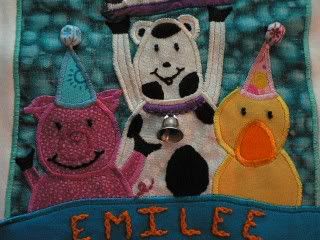
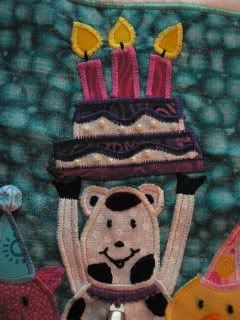
So, I decided right then and there that I was going to do the same. I plan to create a mini-quilt every week. I will use this blog to show pictures of my creations, to document the materials and techniques I used, and to record my thoughts & feelings that influenced the quilt.

I'm excited! I'm thrilled! I can't wait to get started!

I'm sure I will learn something about myself through this process, and I can't wait to see how my techniques improve. All artists need to stretch their creative muscles, right?

I hope you'll stop back and visit, and I hope that you learn from any trials and errors that I am sure will occur. But mostly, I hope that by sharing this with you, you will become inspired and ebrace the artist within.

With friendship,

Care'